
Ferric Chloride is a great substance! A lot of people have it, cause it is used to etch PCBs in DIY conditions. Aside from eating away copper, FeCl3 reacts with a lot of metals, but is harmless to most paints, even paint from a gel pen or a CD marking pen, or any alcohol based pen. And that is used for making PCBs: you clean the copper plate of the PCB, then draw the artwork using such an alcohol based paint (from a CD writing pen, or any other).
The process described here, is very similar, only it's being applied onto aluminum. Aluminum reacts more violently with FeCl3 than copper. Hydrogen gas starts forming and the aluminum objects will get hot very quickly.
I am NOT responsible for anything that may occur to you because of following this tutorial! You will follow this tutorial at your own risk!!!
So, here it is, step by step:
0. Work with rubber gloves in a well ventilated space. Although not deadly, FeCl3 is still a chemical.
1. Prepare the surface: This is a simple one: scrub the surface with either fine smirk paper, or something like Cif Cleaning Cream. You need to clean the surface, and make it as smooth as possible. This is not a chemical requirement, but it's an aesthetic thing. You wouldn't want your surface to be all scratched and dented...
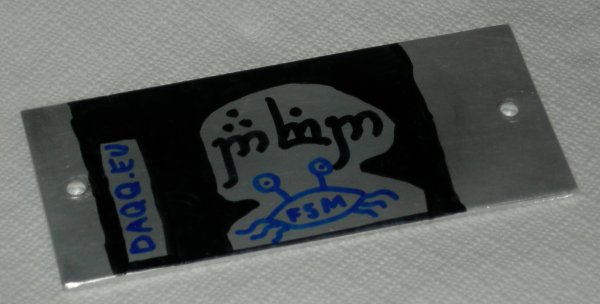
2. Write whatever you need there... but use negative writing. The surface that is protected by the paint will remain, the surface not covered by paint will be disolved. See this example picture:
3. Get the ferric chloride. Go buy it somewhere, or get it by other means. HANDLE IT CAREFULY! Though it is not too dangerous, it still is a potent acid, and should be handled as such!
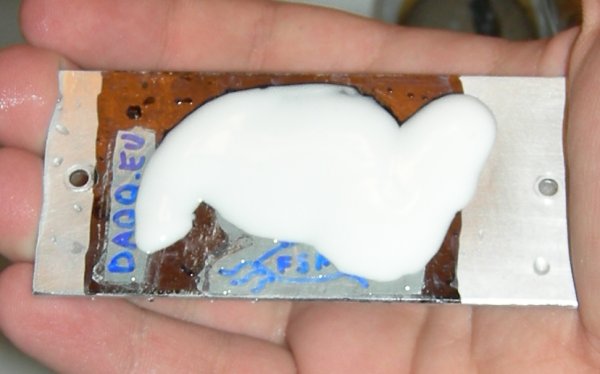
4. Apply the FeCl3 onto the surfaces you want to etch:
To apply the acid I used a very simple wooden stick: first, I dipped the stick into a jar of the acid, then took it out. A small amount of the acid stayed on the stick. I toutched the surface with the stick, and it transfered all of the acid on it onto the aluminum.
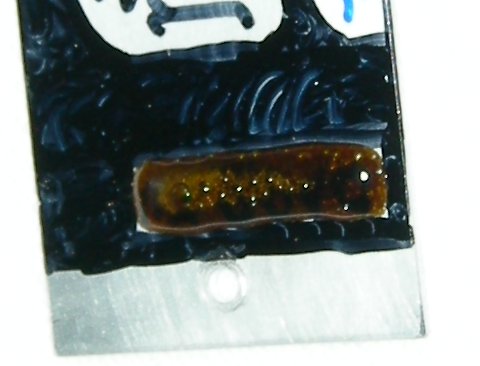
After that, wait until the reactions comes to a halt (approx 1 minute). You can see that by observing the bubbles of gas that are created from the reaction, as seen in the next picture. At first, there's a few, then, there's a lot, and in the end, the rate at which the bubbles are spawned is quite slow. Be wary, that the surface will be quite hot, because the reaction is very exotermic.
Note on the bubbles rising: It's hydrogen! DO NOT use anything around that might throw sparks! Hydrogen is extremely fun...erm...dangerous and explosive!
After the reaction has halted, take a paper napkin, or a towel, and wipe all of the acid from the surface. Then clean it with water.
NOTE: You must NOT put the whole aluminum object into any kind of FeCl3 bath! This could start a VERY bad reaction through out the whole surface, destabilize the paint and heat up very seriously!!!
Do the same for all areas on the surface, that you want to etch:
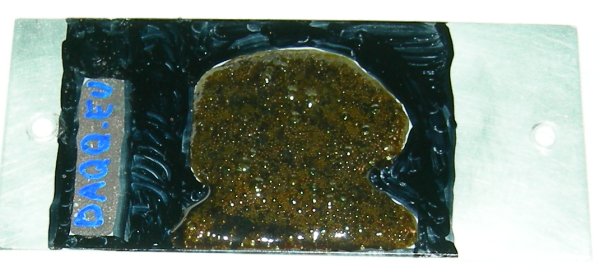
5. Clean and rub and scrub! You now should have something like this:
Note that the etched part of the surface is brown. Now you need to apply some Cif Cleaning Cream (or toothpaste should work also:-) untested) onto the surface and start scrubing it with a lot of paper napkins:
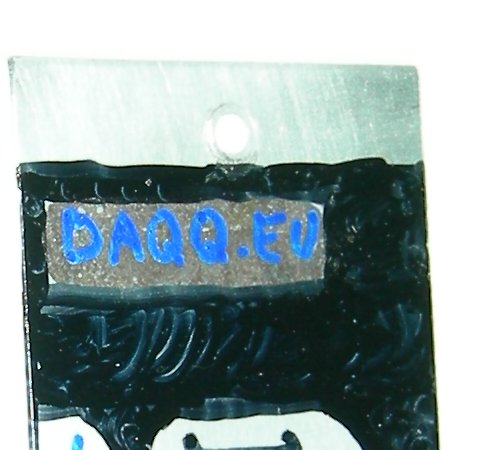
6. Enjoy the wonders of your work!
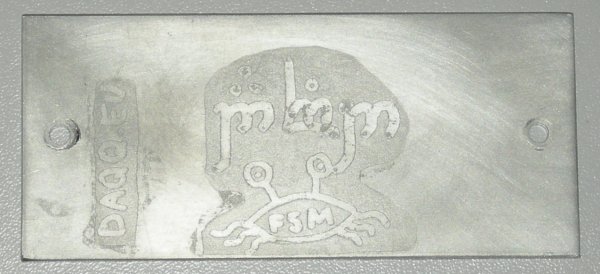
This is the result of scrubing the etched surface a few times. The brown stuff has been cleaned away and so has the CD marker paint.
Enjoy,
David

8 Responses to Etching aluminum with Ferric Chloride