The Concealed codelock (CC for short) is a design of mine, which can be used in a similar fashion as a safe lock, such as that on the picture above.
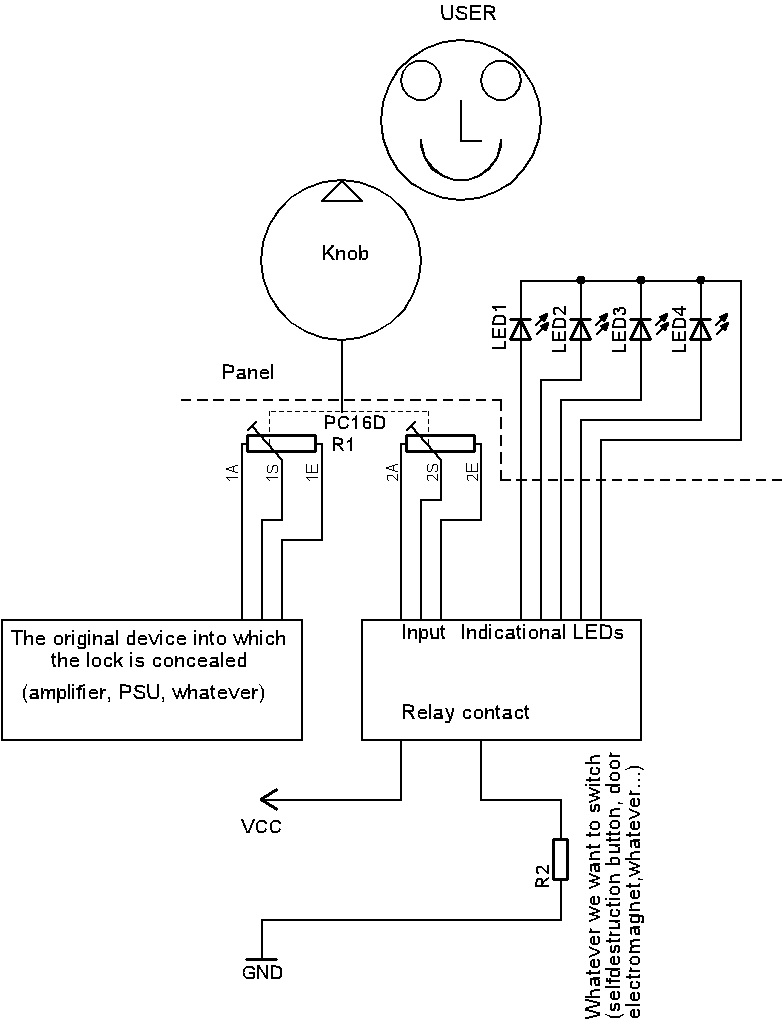
The rotation sensor used here is just a simple 10k potentiometer. The concealability in this is that you can use a double potentiometer. One part of the potentiometer will be used for the lock and the other one for something else, such as a amplifier, or any other normal home apliance that has a potentiometer for something.
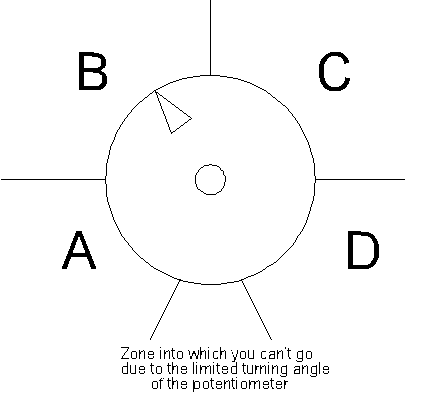
This is an example of it's usage. The potentiometer will be mounted in a normal amplifier. One half of it is used normaly and the other will be connected to the lock. The whole range of the pot. is divided into four parts, A, B, C and D.
The combination to open the lock consists of a sequence like ABCDCBCB. This combination means you'd need to first set the dial to B, then C, B, C, D, C, B and finally A. After this the LEDs will begin to blink and the relay will switch itself on.
Schematic
The Level converter (for configuration):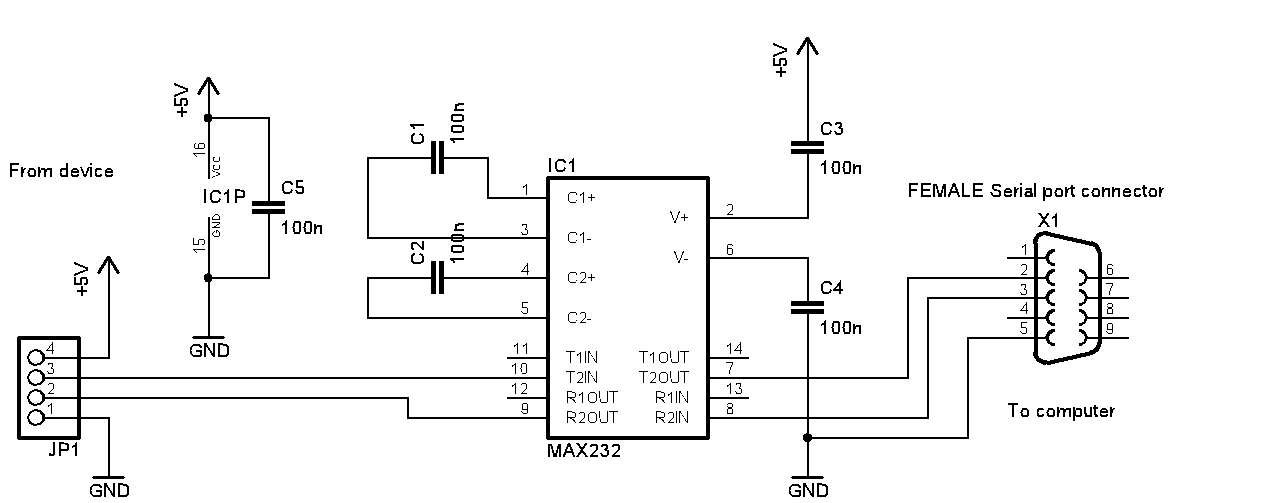
The whole code lock schematic:
Code
I've written the program in good old C for AVRs. The compiler I used is the WinAVR distribution, mixed with AVRStudio4. I hereby open source it, therefore you can use any part of the code, just give me credit, but commercial use is prohibited unless I personally aprove of it.
Click:
to download the project directory, including makefiles, precompiled, working hex file.
How does it work?
The AVR (ATMEGA8, clocked using the internal RC oscilator running at 8MHz) constantly scans the ADC4 channel of the ADC, which is connected offboard to a potentiometer. The pot. acts as a voltage divider, one end of it is connected to +5V and the other one to the Ground. The ADC scans continuosly the divider if there has been any change.
If there has been a certain amount of change and potentiometer was moved from one region (ABCD) to a different one, then it logs the value (ABC or D ) into a string of charactes, which it compares to a constant, storred in the EEPROM and loaded at startup. If the string and the constant are equal, then the lock is unlocked. Thsi will activate the relay contact and also start blinking the LED diodes. After approximately 30seconds, the lock locks itself again.
The lock resets itself each 8 seconds. This is to prevent random dialing over the hours of a random combination that would fit.
The initial configuration is done via serial port. All you need to do is attatch a level converter onto JP1. If you load the firmware into the procesor and the EEPROM is empty, then the program will ask you through serial, to type in a proper code. A proper code may look like this:
CBCBCBCBABCD
To open a lock with this code, you would have to turn the dial to D, then A, then a few times to B and C. Note, that the last symbol in the code must be dialed FIRST.
An example of what the console looks like:
Welcome to daqqs codelock. For the manual and other info check out www.daqq.eu

The lock does not have a code set! Provide one:

Current combination: A
Current combination: AB
Current combination: ABC
Current combination: ABCD
Current combination: ABCDC
Current combination: ABCDCB
Current combination: ABCDCBA
Final sequence: ABCDCBAe
Note that when the 'e' character was entered, the device recognized the end of the sequence. Therefore to open this lock, you'd need to turn the dial to A, then to D and then back again to A. You have to type in the WHOLE sequence, including the parts which the dial will just go through (like instead of typing AD, you'll have to type in ABCD).
Also note, that you can reconfigure the combination at any time. Just unlock the lock. A message will be sent on the serial port, telling you that the lock is unlocked. During the next 30 second you can send a "R" character through the serial line. This will reset the whole device to basic settings- no combination, you have to set it again.
To configure the device you'll need to use some terminal program. I'm quite happy with the BrayTerminal. Avoid Hyperterminal - it sucks!
Where to place it?
The amount of places you can place this device into is enormous. Anything with a potentiometer can be used! Amplifiers, scopes, speakers, power supplies or give it a dedicated box.
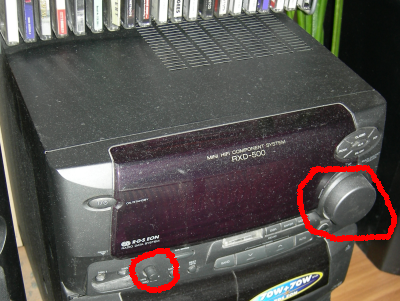
But: the LED diodes SHOULD be made visible to the user, so he will have a feedback from the device. Also, the dial (well, the stuff around it) should be visibly divided to show which part is A, which is B etc. Here's an example of where you could put it:
Your hifi maybe also your key. No one would notice anything and you could put one potentiometer out, replace it with a dual pot. and use it in the way described here.
The scope (or any other lab equipment offer great possibilities for concealment. They have a bazilion knobs and dials and other cool stuff. So whatever you'd like to trigger, you might aswell use a scope for a concealed lock. BTW: It's just an idea. IMHO such a use of a scope would be blasphemous - the greatest measurment device.
How does the prototype look?
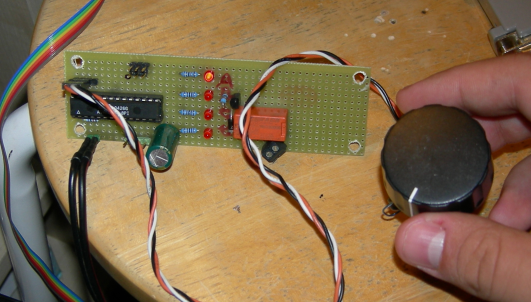
The prototype is made on a universal board, wired and stiched together. Heres a photo:
I know it isn't much, but it's a development prototype. Anyone with a bit of imagination can think of a milion places to hide it. How devious would it look if someone was at your house, and you wanted to give him something - you'd turn the dial on your stereo, three times BC, then to D, then all the way down to A, and voila! A previously locked cabinet would open!
How to make one?
Simple! Simply make the circuit according to the schematic in any way you like (for instance on a miniature board), program the IC with the program and with the fuses set right (ATMEGA8, Clock: internal RC oscilator at 8 MHz, watchdog disabled, reading from memories disabled, etc...). Or I can send you a programmed IC for a small extra fee ( chip cost + handling + shipping ) . If you want this version, just contact me on DARTH.DAQQ [@] GMAIL.COM (remove the breackets and spaces from the address).
After this, configure the system according to the text above and rember your key! Then, place the whole system wherever you wish. The power consumption is about 20mA with one LED on, and the current it draws while the relay is on depends on the relay. The one used in the schematic is just an example. You can use any 5V relay with any type of contacts.
Usage
After configuring the device simply disconnect the level converter and place the device as you see fit. You can put it anywhere within the device it is supposed to operate within.
Enjoy!
PS: If you liked this project and would like to support it, why not donate a little? Any amount will help! Thanks,
David

